Minggu, 31 Agustus 2008
Replace your hot miror !!! Infrared Conversion Instructions
 Taken From : http://www.lifepixel.com/index.html
Masih penasaran cari-cari info tentang IR Filter, Arrrgggg..... akhirnya sampe ke website ini http://www.lifepixel.com/index.html, disini tempat yang menyediakan layanan konversi kamera digital biasa menjadi menjadi kamera digital dengan filter IR (Infrared) tertanam didalamnya. jadi begini sodara-sodara... Apasih IR itu ??? tau gak loo.... Xixixixixi gini brur... gw ceritain atu-atu (sok ngarti), dari artikel-artikel yang gw baca di nginternet, mata kita itu cuma bisa nangkep cahaya dengan panjang gelombang diatara 400-600nm, nah sama halnye ama kamera digital, selidik punya selidik ternyate di dalem kamera digital ntu (tepatnya di belakang lensa) ntu udeh ade filter IR yang dari sono nye (pabliknya) yang berguna untuk menangkal sinar infra merah masuk, ini karena sensor CCD nyang ada di dalem kamera digital bekerja sangat efektif dalam menyerap sinar Infra Merah.
nah singkat kate untuk ngedapetin foto IR, kita kudu ngebongkar kamera digital kite, buang IR blocker nya (orang bule bilang hot miror), trus ganti dah pake IR filter baru ( IR fileter disini maksudnye filter yang cuman ngelewatin sinar Infra merah doang).
nah kalo masih pengen baca aye kasih tau info atu lagi ini, pan dipasaran banyak tuh filter-filter IR nyang tinggal pasang aje... ngapain pake bongkar-bongkar selage... nah ini jawabannye, dalam kondisi standar kamera digital kita pan nge blok sinar infra red, trus dengan di tambahin filter IR di depan lensa, yang berfungsi cuman ngebolehin sinar IR yang bisa lewat berarti kita kudu pake ISO rendah + waktu exposure yang lama, bisa sampe 6 detikan deh, yang berarti pula kita kudu pake tripod untuk ngambil gambarnye, berbeda dengan cara kalo kita ganti hot miror di kamera kita dengan filter IR, gak butuh lagi tripod. mo tau gimane cara nguprek nye.. nihhhh..... :
ane cuman ngambil untuk nguprek kamera canon digital rebel (300D), mo tau cara nguprek kamera lo ? liat aje ndiri di website nye (kalo ada) , kalo takut bongkar-bongkar ndiri, ada kok yang udah profesional yang nerima jasa bongkar.
http://www.lifepixel.com/IR.htm
Disclaimer: This tutorial is made available for informational purposes only. Tampering with your camera will void your manufacturer's warranty. If you decide to perform the conversion you could damage your camera or be hurt or get killed from the high voltage present - you do so at your own risk, we are not responsible for camera damage or any harm you may suffer or any special or consequential damages.
Webmasters: Please do not hot link or copy content, instead you may link to this page like this: Infrared Conversion Instructions
You will need these tools & supplies to follow the Rebel XT infrared conversion tutorial:
- Our custom glass infrared filter to replace the hotmirror
- Soldering iron and desoldering wick or desoldering gun
- Black silicone adhesive /w syringe type dispenser
- Small philips type screwdriver
- Tweezers
- Canned air
- Lens cleaning solution & tissue
- Grounding strap /w current limit resistor
If you prefer not to risk damage to your camera, have us convert it for you here. It would be best to perform the conversion in a well lit area that is as clean and dust free as possible. Wearing a grounding strap will minimize the chance of zapping your camera with static and most likely rendering it dead.
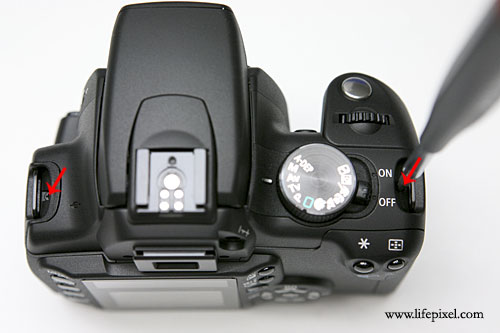
Remove marked screws.
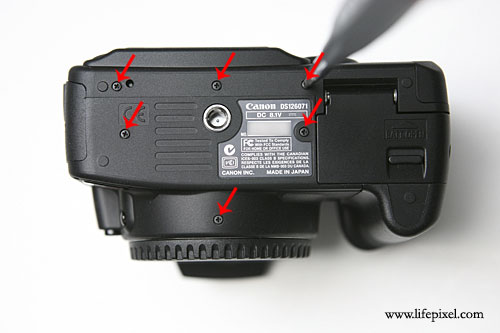
Remove marked screws.
Remove marked screws.
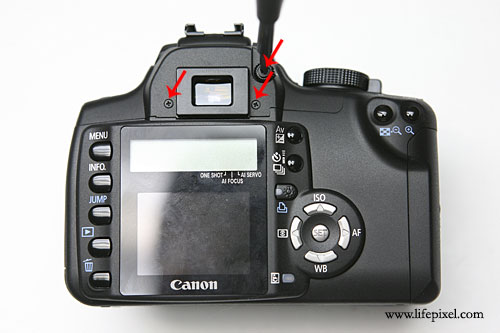
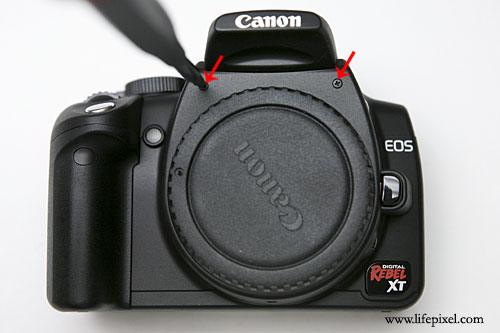
Remove marked screws and diopter adjustment knob.
Remove marked screws.
Remove marked screws.
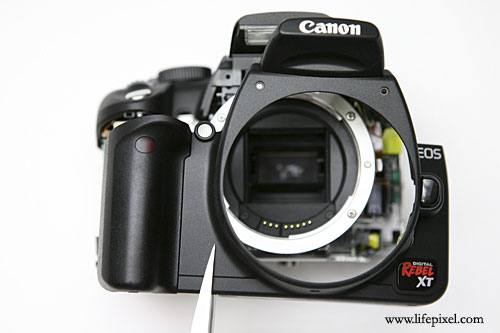
Remove the front cover.
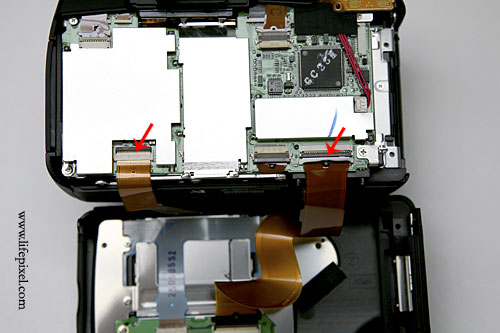
Flip over the rear LCD panel and disconnect marked cables.
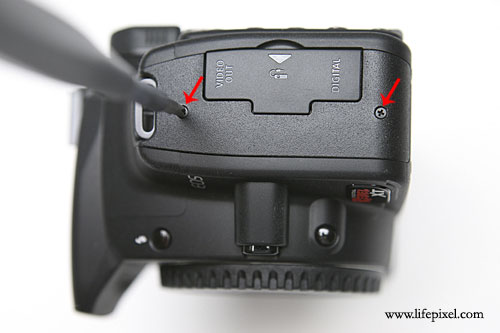
Disconnect marked cables and remove the I/O port cover (blue arrow).
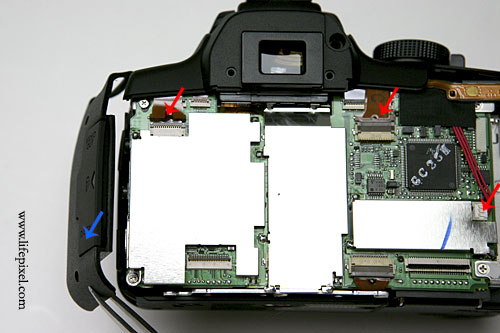
Push up the top cover and remove the black tape.
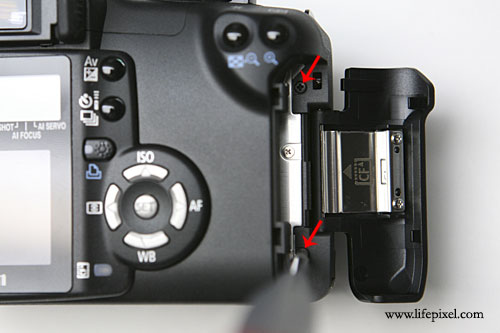
Disconnect marked connectors and screws.
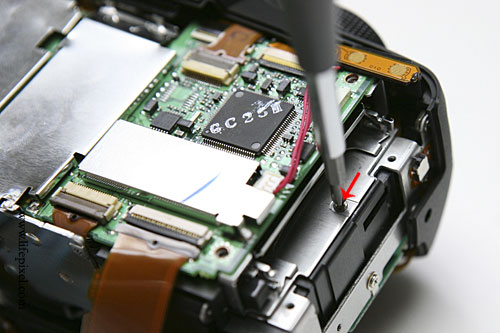
Remove marked screw.
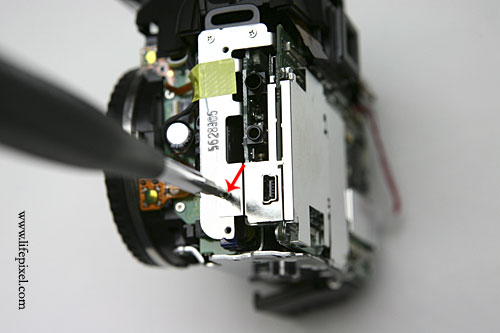
Remove marked screw.
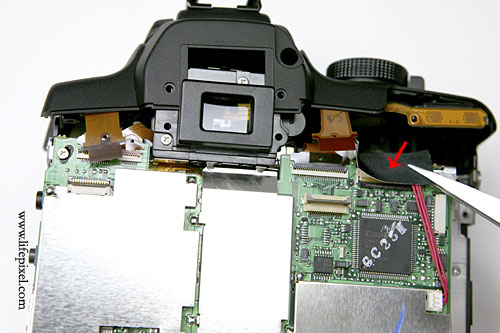
Desolder the marked solder joints.
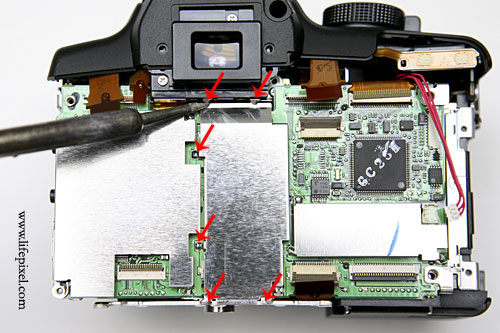
Lift out the metal shield.
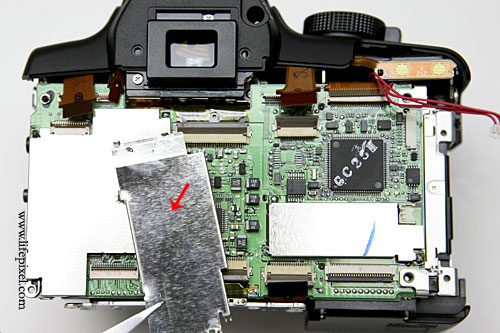
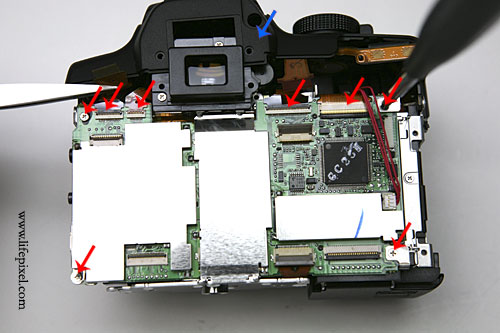
Disconnect the marked ribbon cables and flip over PCB.
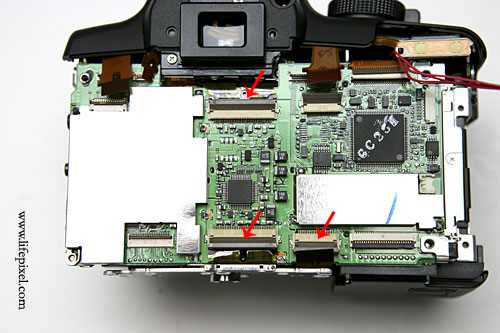
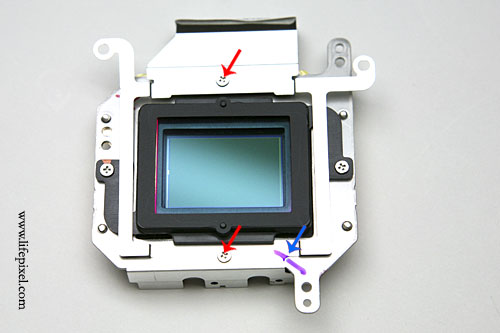
Remove marked screws and lift out the sensor assembly.

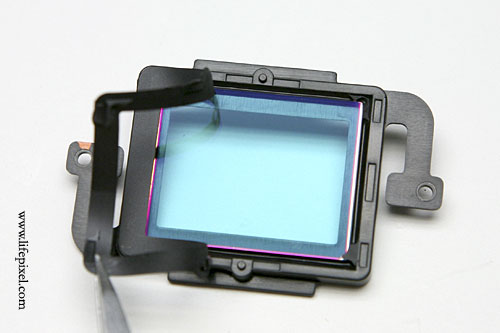
Paint a mark as shown with blue arrow to help with reassembly. Remove marked screws.
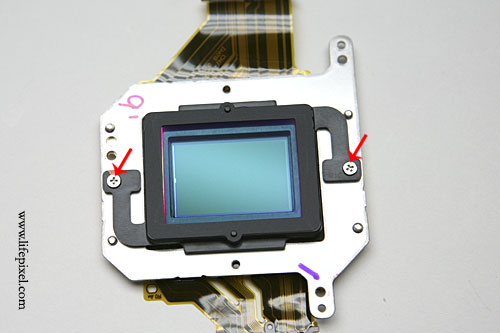
Remove marked screws.
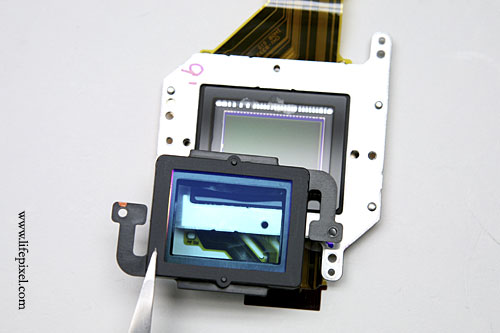
Lift out the hot mirror filter assembly.
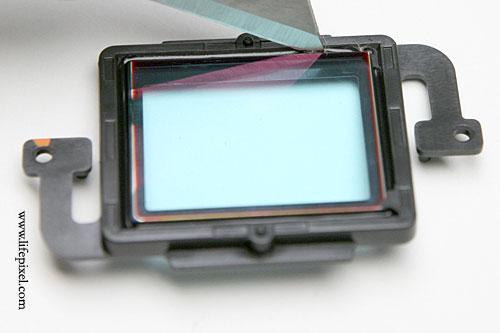
Gently peel off the double stick tape gasket.
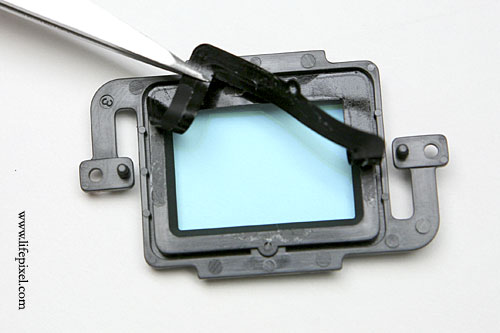
Peel off the black mask.
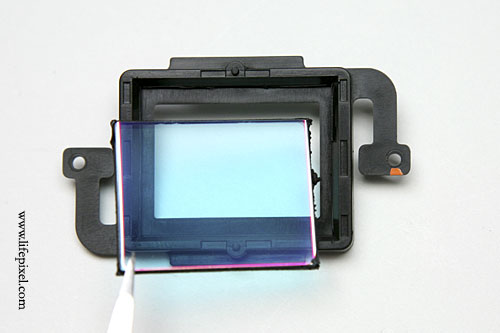
Gently cut through the adhesive around the hot mirror filter.
Remove the hot mirror filter.
Place the infrared filter in position.
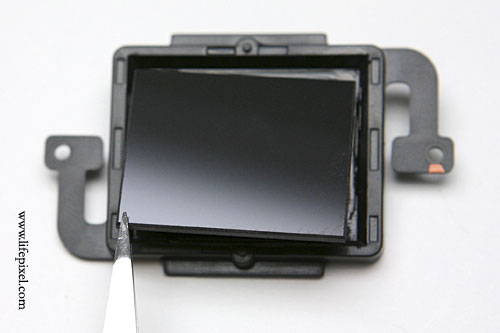
Apply black silicone seleant around the infrared filter to fix in position and seal out dust.
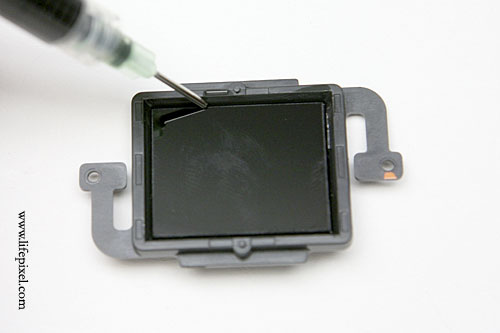
After adhesive is fully cured clean the ir filter with lens cleaner and tissue, blow off with canned air and reassemble everything by following the instructions backwards. Set a custom white balance per our instructions page and take some test shots to make sure there is no dust trapped between the sensor and infrared filter. If you find dust and find it objectionable disassemble the camera again, blow off the sensor with canned air (make sure only air and no liquid is coming out by purging and holding it upright) and re cleaning the infrared filter.
If you prefer not to risk damage to your camera, have us convert it for you here.
Senin, 18 Agustus 2008
-Ray Of Light-

liburan 17-an di Kunduran-Blora, sempet-sempetin poto-poto mumpung cuaca bagus, cerah berawan ! cuman foto-fotonya banyak noise nya! mungkin karena menggunakan resolusi rendah! atau mungkin kameranya yang gak mumpuni... wekekekeke.. namanya juga amatiran :p
Minggu, 10 Agustus 2008
-Selamat Jalan Teman-
Telah berpulang ke Rahmatullah salah seorang sahabat kami Dadang F. pada usia 27 Tahun, minggu, 10 Agustus 2008 sekitar pukul 1:30 WIB karena Sakit.Semoga Amalan beliau bisa menjadikan bekal dan penuntun menuju SurgaNya Allah SWT. Selamat jalan "Blewah" !
Foto-foto kenangan bersama Almarhum Dadang F. :

Hai jiwa yang tenang.Kembalilah kepada Tuhanmu dengan hati yang puas dan diridhai-Nya.Maka masuklah ke dalam jama'ah hamba-hamba-Ku. Dan masuklah ke dalam surga-Ku. ( QS Al Fajr : 27-30 )